02. Practicing the DIGITS Workflow
Practicing with the DIGITS Workflow
In this project, you will be leveraging NVIDIA’s DIGITS workflow to rapidly prototype ideas that can be deployed on the Jetson in close to real time.With DIGITS, you’ll prototype classification networks, detection networks, segmentation networks and even more!

In the first part of this project, you’ll practice with the DIGITS workflow on data that is provided for you.
We will be leveraging the power of Udacity's new workspaces with the power of NVIDIA GPUs. You will be allotted 50 hours of GPU compute time so be vigilant with your usage. There is no limit on instances that are in CPU mode or use CPU mode. The DIGITS workspace can be found at the end of this module.
Start DIGITS
Start the DIGITS server by entering the command digits into a terminal. This will begin the boot of the DIGITS server (it will take a minute).
Now, from another terminal run print_connection.sh in order to get the link for the DIGITS GUI (Graphical User Interface). Keeping this script running will keep your workspace active if you are training a network but be sure to quit it if you are not using the workspace as it will use all of your GPU hours.
The Data
Let’s pause for a moment to talk about the data you will be training.
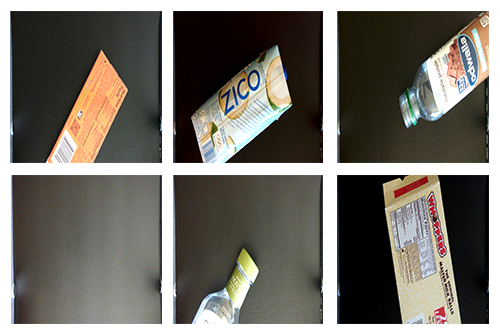
These are photos taken from a Jetson mounted over a conveyor belt.
We are training pictures of candy boxes, bottles, and nothing (empty conveyor belt) for the purpose of real time sorting. This kind of design can be extrapolated to many things that require real time sorting.
Here are some examples of the data:
Add the supplied dataset into DIGITS. It can be found in the data directory (/data/P1_data).
The provided data has the following file structure:
P1_data/
├── Bottle/
│   ├── Bottle_1.png
│   └── Bottle_2.png
├── Candy_box/
│   ├── Candy_box_1.png
│   └── Candy_box_2.png
└── Nothing/
    ├── Nothing_1.png
    └── Nothing_2.png
Once your data is imported, it is up to you to choose a training model. You can use a pre-supplied one, one from the DIGITS model store, an external network or even customize the above choices.
Your model will have to achieve an inference time of 10 ms or less on the workspace and have an accuracy greater than 75 percent.
Evaluate the model
Test your trained model by running the command evaluate in another terminal with the DIGITS server still running, but only after you are done training your model. It will ask you for the model’s job id which can be found here:
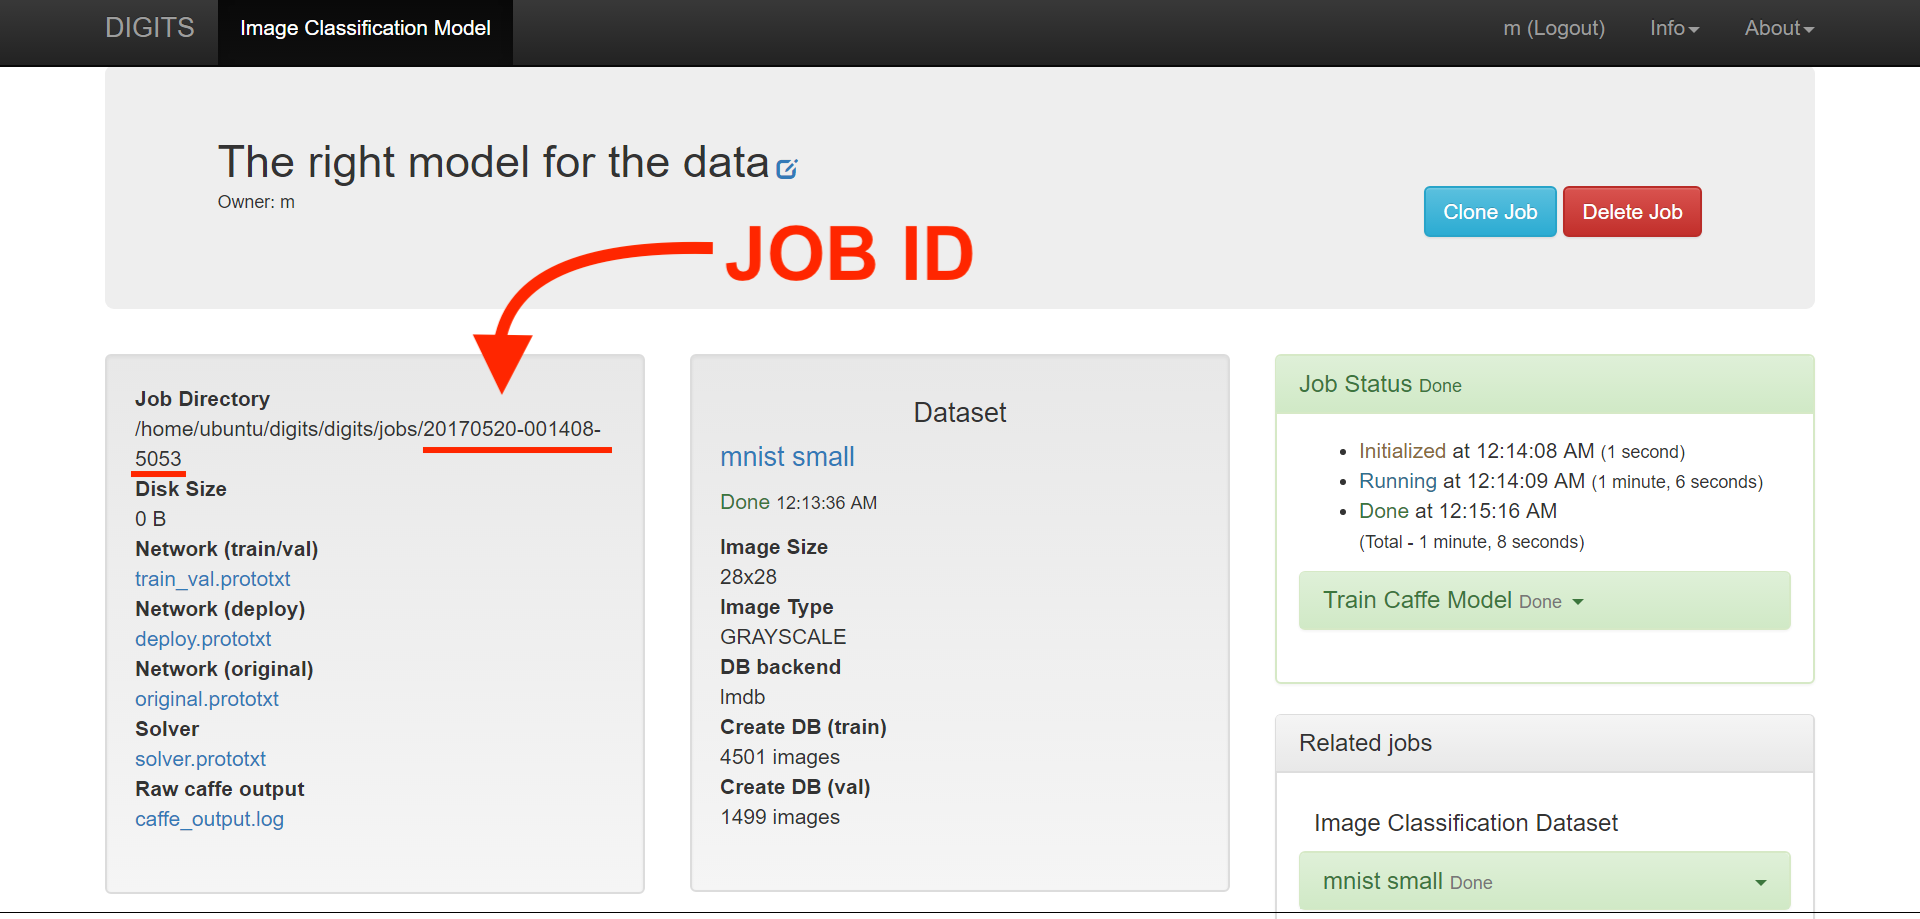
It will then print out the results of this model. The evaluate command checks the inference speed of your model for a single input averaged over ten attempts for five runs. Take a screenshot of it to include in your write-up. It uses Tensor RT 3.0 to achieve this in a very fast time. Then your model is tested on a test set that is not used for testing or validation. Do not spend too much time trying to make a model work above the required results. It is better to spend that additional energy working on your own Robotic Inference idea, which we will talk about next!
Note: The evaluate command will not work with your custom model.